Hello and HAPPY NEW YEAR! I just thought I’d throw a little update up. Here are some of the quilts I made this year–I made about 10 more but they are for Cindi McCracken Designs and will be used in a future quilt market and so, cannot post the pictures just yet! (Cindi is AWESOME. Google her and buy her patterns!)
Here are a few pictures of quilts from this year:
It’s been a fun year! The three blue and white quilts were made for elders in the Chiniak Bay Elderhouse. The Diamond Eyes quilt I tested for Patterns by Shaley and the Slideshow quilt was also made for individuals at the Care center. The Dragon Star by Quiltworx quilt and the Ursa Major by Legit Kits are for 2023 graduates. Of course the mermaid AND the leaf quilts were commissioned and made for my great friend of mine, Geoff. I capped off the year with the Alentejana quilt by Ships and Violins for me!
Here’s to a new year… one that I hope I will have NO knee operations in and a lot more quilts made! :)
Hello! It’s been a while but I wanted to catch everybody up on how things were going in my quilting world!
I moved back to my hometown in June and I have been on the go ever since working on my yurt, teaching summer school, making things comfortable in my new home, and then starting my first year in a regular classroom after 20 some years of teaching special education.
Spring at the yurt! Getting her shirt on, planting potatoes, making it my home.
It hasn’t slowed down much yet mostly because there’s only so many hours in a day! For a while there it was a lot of getting my house in order getting, taking things out of totes, you know, the normal stuff of moving. Then school started!
A little interior shot.
I’m teaching a 6th grade class this year. I have never taught a regular class and was given the gift of these students by the district. It is such a fun class. Our big project is raising lettuce for the school to have at lunchtime!
They are full of plants now. This was from original set up.
I’ve also managed to quilt a few little things for my classroom but I have big plans for Thanksgiving and Christmas breaks.
I continue to work on making a bathroom and setting up my yurt’s kitchen!
Kitchen progressBathroom walls… now I just need Sheetrock!
Stick around for some quilts now that I’m pulling out fabric out of my totes! 😂
My second shelf with fabric I haven’t seen in years!
Well, this is the last post of the year for the 2021 Island Batik season. It is also my last post for Island Batik Ambassadors. What a fun year this has been!!
English Paper Piecing is something I have been fascinated with ever since I saw the La Passacaglia Quilt in the Millefiori 1 book by Willyne Hammerstein. I was so entranced that I bought some of the “starter” kits by Paperpieces.com to see if it was for me. You see I had always sworn off the idea of hand stitching until I saw the La Pass quilt. Well, I bought it, tried it, did not think it was for me and gave away the whole kit I had made to a dear friend. Then, I waited…. About 3 months later I bought the whole thing again! 😂 I couldn’t stop thinking of it!
I have been gathering cute print cotton and slowly making rosettes ever since!
A few rosettes for my LaPass quilt.
I blasted in with no good plan except to make these rosettes put them together and have the most beautiful quilt… except the work gets exponentially laborious the bigger they get! I did not have a good plan (like making all the stars one color to bring it all together). I also am not much of a print cotton girl preferring batiks, however, batiks are harder to stitch since they are so dense usually. My rosettes are years old. Eventually I’ll get it done!
I will say I carry around my kit all over.
My kit has glue pens for basting, scissors, thread, papers, a tinier sewing kit with appliqué needles, little repositionable leather dots for thimble like use, acrylic templates and papers.
I started an English paper pieced quilt back in 2013 when my mom came to live at the Chiniak Bay Eldercare House. A joke for my sister… a quilt full of Forget-Me-Nots that I worked on as I sat with my mom who was slowly slipping away to Alzheimer’s. I’ll eventually finish for her.
The forget-me-not quilt blocks for my sister.
When the challenge came up got Island Batik I got busy shopping for the perfect project… and finally realized I love the LaPass rosette and thought I’d do a pillow cover.
The makings of a rosette.
What I didn’t think about was my thread color. Preferring a neutral has always worked for me. Until now and after working on it for a while decided the grey was not a good choice and I opted to recut, restitch and fix.
The block on left with coordinating Aurifil vs gray neutral on right.
Once restarted I made some faster work but decided in the holiday season to also to change my final project into a… stocking!
I left Kodiak on December 17th to do a quick doctor appointment and run some errands in “Town” (Anchorage) before heading to Sand Point. On the 20th I hopped on the 2 1/2 hour flight to see my sister. After nearly 2 hours of flying they turned us around, but I got a lot of sewing done! The next day we attempted another flight and made it!
Well, I worked all week and… eventually ran out of all the Island Batik fabric I brought with me… using every bit of what I had cut and sill ending up about 3 inches short!
*** A quick fact about the internet and rural Alaska… the internet is basically nonexistent: it’s slow, expensive and works intermittently. Working on this post was not possible unless I drove to the school and sat in the truck outside the building and jumped on their wireless and even then the above photos would not upload to WordPress. Schools are where many people in rural villages go to get access to internet that is somewhat reliable and, often, on a good night you can find many trucks or cars lined up around schools with people using the wireless.
I got back to Anchorage on the 30th, ran to more doctor appointments, ran some errands and flew back to Kodiak. Being back allowed me to finish this blog post in the comfort of my own home—including uploading pictures! ***
With me running out of another rainbow color run fabric I started with some black I found in my stash in my yurt… after sewing it together I decided it did not have enough joy. So, on the last day of the 2021 year I am tearing out the black to finish the stocking the way I want it to look. It will be my last finish of 2021. I’m going to post this now but I will update… Next year!
A HUGE thank you to Aurifil, Hobbs batting and Schmetz. I. had a really fun time being an Island Batik Ambassador this past year–between 2 knee operations and sleeping like 4 months the projects really helped me focus and be present.
Happy 2022. I wish you love, good mental health, time with those you love, and prosperity in all your crafty endeavors.
This month’s challenge, Storm at Sea, was a JOY to make! I love the Storm at Sea pattern and have made it many times in the past.
The first time I made it was about 1996 or 97. I made it as a going away gift for a paraprofessional in my classroom. It was purple, cream, salmon and had silver metallic lightening bolts in it. I only tell you all the colors because, unbeknownst to me, I only had black and white film in the camera.
See those sweet girls in the first picture? They turned out to be the mommas of the babies I gave these two quilts to:
Athena’s baby quilt, given 9 years ago
Cory’s baby quilt, given 15 years ago
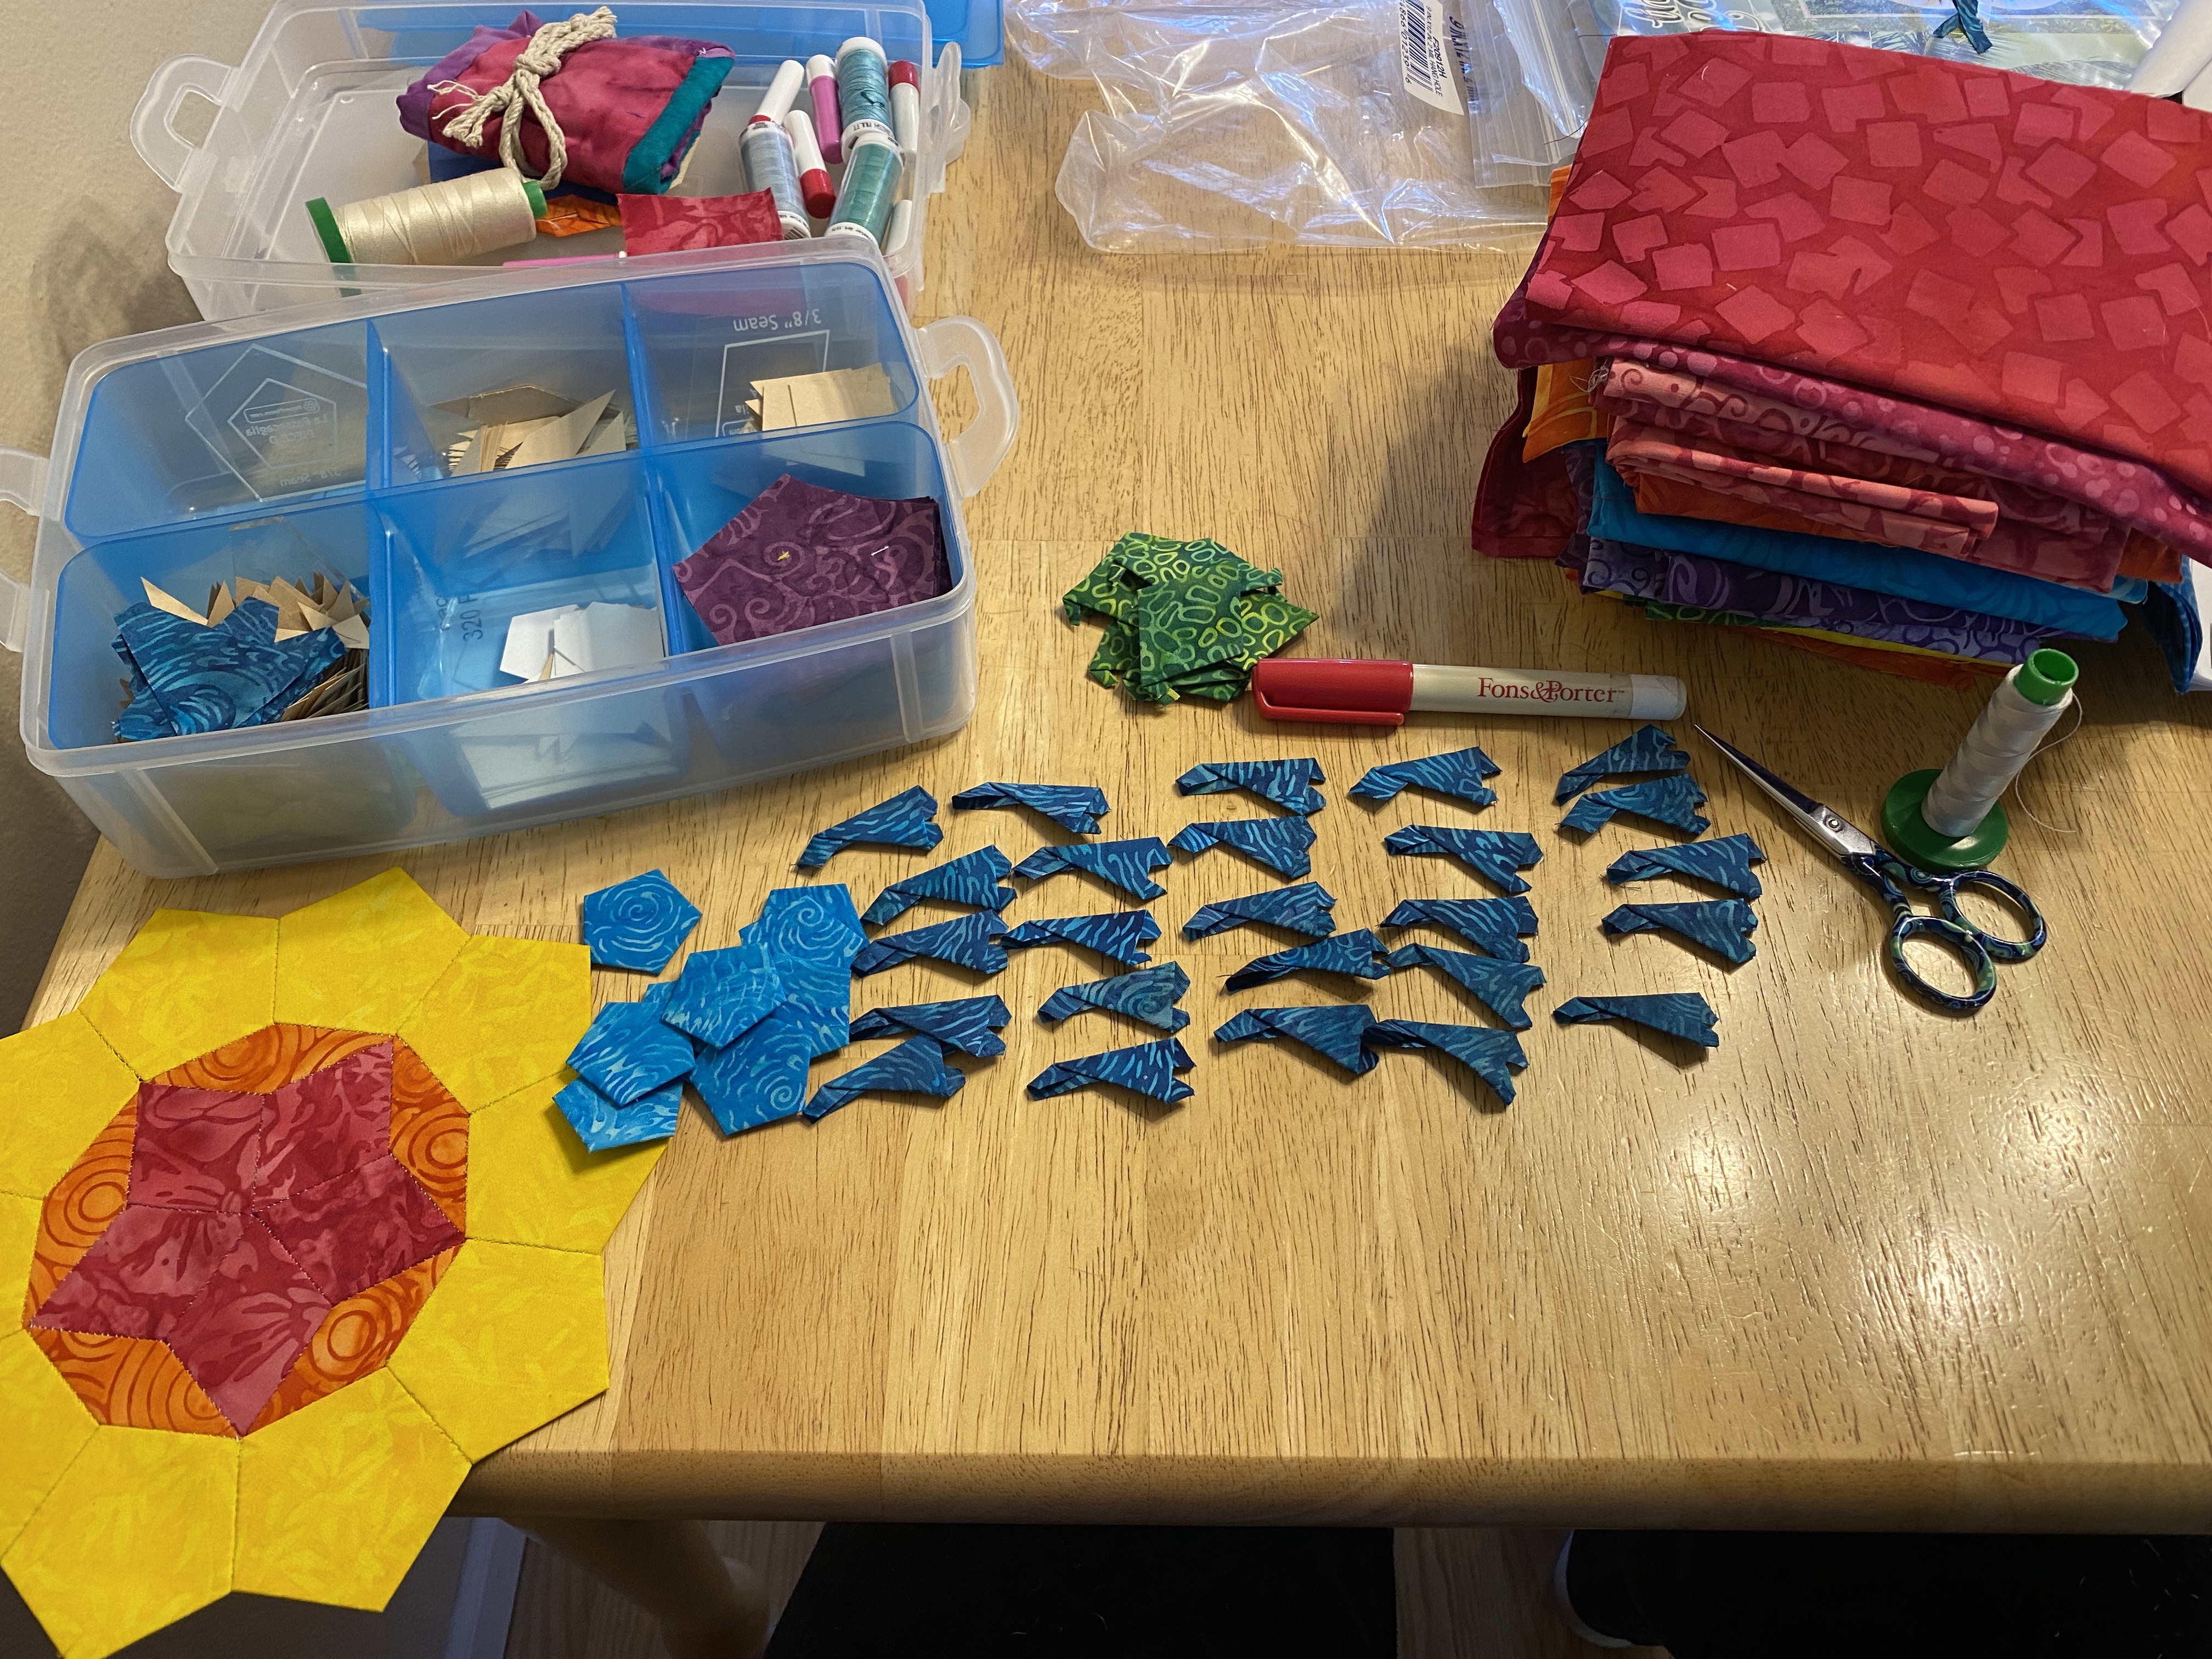
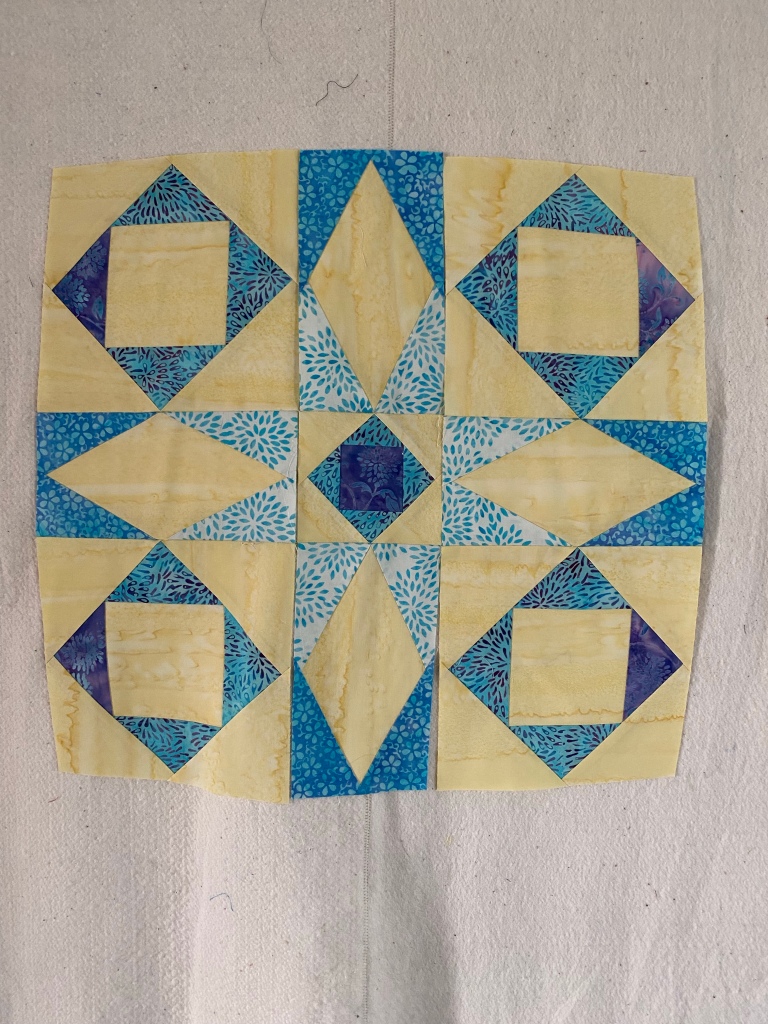
To get ready for this month’s challenge I started early with a couple of newer patterns printed at 50%, a bunch of scraps, and ideas swirling around in my head.
Orange/blue pattern by Sylwia BK of I Love to Quilt, Blue/green/purple/pink pattern is Ripple by 3 Dog Quilting
Both patterns were very fun to make at a smaller size. I love how the Ripple turned out–I think it looks like an eye with all it’s 45 degree angles. It willl make an amazing back of a quilted coat someday. The orange and blue is a little too big to be a placemat so I think it could be a nice table topper eventually.
When I opened the package to find out my color way, I completely fell in love with the Passion Petals collection. This collection was designed by Kathy Engle for Carol Moellers of Carol Moellers Designs and its colors are soft and BEAUTIFUL.
I was trying to figure out how I could incorporate one of the circular Storm at Sea patterns I had when I stopped by my quilter to drop off a quilt. Martha had been going through her patterns and had A Little Bit More Storm at Sea quilt pattern from Cindy Edgerton that she was looking to get rid of. PERFECT for one of my ideas. I snapped it up and ran home! These patterns are printed to a “meatier” tissue paper and are really fun to work with. The pattern instructions are just a page and really are simple and straightforward. Its original size is 52 1/2 by 52 1/2.
I decided to also quilt the Storm at Sea 3D pattern I had gotten from Sylwia BK of I Love to Quilt which is approximately 34 inches wide and place it in the center of the “flat” Storm at Sea pattern. So I got to work using the delicious “Butter” foundation fabric included with the collection color way.
It turned out great except I didn’t use enough of the collection for my liking–to show off the delicate, soft pinks and purples in the rest of the collection. I also decided I needed more of the butter fabric and so I ordered five more yards thinking I could back it with the left over. Once it arrived I got busy working on the background Storm using A Little Bit More Storm at Sea pattern. I kept placing the circle as I worked on it–wondering if I was doing the right thing!
I finally got all background pieced. I made a few decisions about color/pattern placement: I only had four different pinks and didn’t want to have too much of one pattern “clumping up” in the design. Also, with only two blue on blue fabrics I wanted to be purposeful on where they were placed. The purples were too lovely to make super scrappy so I deliberately pieced them on same blocks, hoping it would give the quilt a solid background to place the circle in so it would sort of “float” off. I reversed the butter fabric on the background Storm hoping that the dark purple on purple would define the sphere and have it lift off the background.
I have found on previous quilts the trick to something like this is to place the circle into the background rather than appliqué it. In order for the placement to work out, I needed to find the center of both the background Storm and the 3D Storm.
To make sure I placed the 3D block correctly I pinned north, south, east and west with longer pins to the background and then really pinned down the rest of the circle to the back of the background. The trick to dropping in a circle is that the cut away circle has to be 1/2″ SMALLER than the circle you are putting in. Well, these were monster pieces–a 34″ circle?!? What to do? Mark it with a pen? Chalk? How to do it?! I needed to cut UNDER the 3D Storm. For the sake of ease I decided to sew around the 3D block (using Schmetz 70/10 needle) with a different colored Auriful thread–bright red!
Once I had my red thread guide, I unpinned the two pieces, grabbed my small ruler and cut 1/2″ inside the red line.
I found my north, south, east and west pins and repinned the background to the 3D center. Sewing such a nice gentle curves on my Bernina 350 is just so easy–as long as I pin the heck out of it! Then, once placed, sewn and pressed I simply snipped out the red thread.
While I “drifted” a little on the placement–it’s not quite centered on west/east placement–I like how it turned out! After the bubble was placed, I finished up the border using, Opal, another great foundation fabric that was sent with this collection.
This made the quilt size stretch out to 52 1/2″ by 60 1/4″. Once the center was placed, the border added, I pieced the left over butter fabric I bought for the backing (perhaps five yards was a bit overkill!), grabbed my Hobbs Batting and raced off to my friend, Martha, who is my long arm quilter. She quilted a pattern that looked like a wild wind.
Students holding up my Storm at Sea.
Kodiak is an island where the storms at sea last for days, sometimes weeks! The storms are unforgiving, ferocious and wonderful. This will be a quilt I will give to a graduate next year–to remind them where they come from and how wild it can get here–to keep them warm wherever they go.
Don’t forget to enter the Island Batik Blog Hop giveaway!
Click on picture to take you to Rafflecopter entry form.
There are some beautiful quilts already posted and more to come! Jump into the hop and see what the other Ambassadors have made–I predict you will love them!
This month’s challenge is about an amazing thread program Aurifil has been doing this past year. The focus of the program is highlighting endangered animals by challenging sewists to paper piece an endangered animal and using 3 coordinating threads to quilt the mini quilt. Great way to highlight right?
I was challenged to use the tread related to the Pink Land Iguana.
Information from the Galapagos Conservation Trust stated “One of Galapagos’ most recently described species is also one of its genetically oldest. Pink iguanas are not just a different colour from other land iguanas; they are a completely separate species. There are only around 200 left, and they are confined to the slopes of Wolf Volcano on Isabela, making them one of the most vulnerable species in Galapagos, as the volcano is still active.”
I started to get curious… Pink animals? Like, how many can there be?? (I could only think of flamingos off the top of my head.) If there are some pink animals, are they endangered as well? I started my Google searching… and what I found was there are A LOT of pink animals out there! Sadly many are endangered or on the brink of extinction.
I started to look around at the number of extinctions that happen every year and some studies, cited by the World Wildlife Fund, indicate that between .01 and .1 percent of all species go extinct yearly, which doesn’t seem like many–only if there are 2,000,000 different species worldwide (scientist don’t actually know the numbers of species we have as we keep discovering new ones) that means between 200 and 2000 animal species go extinct annually. Which, again, doesn’t seem like many unless you consider extinct means GONE FOREVER. The other thing to consider is that, unlike the past, we–PEOPLE–are responsible for the mass extinction occurring now.
I decided that since Aurifil is highlighting the Pink Land Iguana to bring up a level of awareness that I would highlight another pink animal. I found a page on Treehugger.com that highlighted 14 different pink animals that are endangered. From the birds to bugs to sea animals it took my breath away the first time I read the article… I found it to be so sad! However, it also inspired me to focus on another interesting animal–the pink Amazon dolphin!
The problem with making a block with the Pink Amazon dolphin is there were no quilt blocks I could find–so what to do? Appliqué? Paper piecing? Traditional piecing? Finding a pattern was hard so I decided to make my own… easier said then done–I pulled some paper piecing patterns and tried to elongate the nose and “square up” the body. Nothing looked right or represented the shape of the Amazon dolphin. Then along came a pattern… like a tiny miracle. Elizabeth Hartman came out with Rainbow Rainforest and one of the blocks, in this traditionally pieced pattern, was an AMAZON DOLPHIN!
As days get shorter in Alaska, the temperature starts to drop, it is colder, the fall storms start, and in a regular year we would start moving our outdoor gatherings to more indoor activities. It would be a time to start considering retreats and sewing at friend’s homes.
This, again, is not a regular year. It’s time to start checking with friends about vaccinations, about how comfortable they feel with and without masks, AND THEN making plans to sew together! Hopefully, you all are vaccinated and so is your friend and family bubble. For me, working with the main group of unvaccinated, 3 to 11 year olds, I am super cautious about where I go, who I see, what I do. After having been so careful for over a year and a half, being vaccinated, and then casually getting Covid, I see how easily it can be passed and how important it is to protect each other. As I look to gathering with friends I am excited to have this challenge under my belt… AND in my hands!
September’s Island Batik Challenge just happens to be to make a bag from a By Annie pattern. For me the selection of a pattern was super easy! I was excited to make a Ultimate Travel 2.0 bag so I could drag around my sewing machine.
Now this isn’t the first bag I’ve made, but I have to say, the pattern was so NICE and easy to follow–especially with the video support that it was a JOY to make. I also cannot get past HOW LOVELY Soft and Stable is. It make making this bag SO EASY! To say I am sold on using it from here on out is an understatement! I pledge to use it EVERY TIME!
Island Batik asked us to pick fabrics in order to complete. In my case I needed a main fabric, a lining fabric and an accent fabric. I selected from Fancy Feathers, which has rich beautiful jewel tones, for my main fabrics and pool for my accent fabric from Island Batik foundations.
The first step was quilting my fabric on to the Soft and Stable and cutting the correct size for the construction. The beauty of quilting both outside and inside at the same time is multifold: my lining fabric stays where I put it, it looks so professional, and it all doesn’t get misplaced as I work!
Once all the major bag sections were quilted, measured and cut I moved on to making the accent pieces–the handles, the straps, the pockets, and placing the zippers.
After watching a few By Annie videos I feel like I was well educated to begin the construction on this bag. I was worried (although I later understood I had no reason to be) that this bag would be hard to put together–it’s a little large and I was concerned about joining all the bits together. HOW WRONG I WAS! It was a SNAP! It felt like it flew together.
The joining all the front and back to the center piece was so easy! I was really impressed how well the big gentle curves sewed together and my bag turned out GREAT!
It is the PERFECT size for my 350 Bernina–all the bits and pieces fit nicely in and I actually have some room to spare. I am ready for getting together with my bubble to sew!
This Ultimate Travel 2 bag was made possible by By Annie and Island Batik. I was so impressed with the pattern and Soft and Stable I ended up making a second bag for my other 350 Bernina! I am ever so grateful for this fun bag making opportunity.
P.S. I did end up running up to Anchorage last weekend for a doctor appointment and took it along. I was a great bag for a quick run to Costco to get a few things. Here it is, in the wilds of the Anchorage airport!
This month’s challenge was to use at least one of Deb Tucker’s tools and a new fabric collection to make a fun quilt.
I was sent the Midnight Dazzle collection in my July Island Batik Ambassador box. This BEAUTIFUL fabric collection spoke to me immediately—I love some bright jewel tones!
I was also lucky enough to get the Split Rects tool. I own some of the Deb Tucker quilt patterns and have been meaning to do a few of her patterns for a while. (Don’t we all have one or two!?)
My sew sister, Tina, just happened to have several of Deb Tucker’s tools and a couple patterns. As I was rummaging through her ruler organizer, I decided to borrow her Deb Tucker’s Corner Pop tool and make a baby sized Fiesta quilt. The fabric seemed to be a perfect match for this project.
Deb also had a really GREAT video about how to use the Split Rects tool where she demonstrates how to use if you’re right handed or left handed. The video really helped me see the potential of this great tool. I can’t wait to create more quilts using it!
This quilt started off fairly fast and easy. I love “spinning” the lumps out by pressing the blocks in the same direction. It makes everything lay down so nicely.
And I worked quickly through the pattern using all the fabrics for this project. I was given two coordinating blues from Island Batik that I decided to incorporate into the quilt.
Background and border.
I used the lighter fabric, Rain, as the background and I elected to set off the border on the quilt by using the darker coordinating blue, Waterfall.
I felt an urgency to complete this quilt ASAP and I wasn’t sure why.
While I was working on this project a tragedy struck. In Canada in a tiny town named Lytton, there was a wildfire that raced through their town leveling it in about 15 minutes. I knew why I was working so hard to complete this baby quilt!
A call went out from Katja Marek in Kamloops, BC, Canada over Instagram, they were asking for quilt donations for the homeless residents of Lytton. I went to the Kodiak Bear Paw Quilters guild and urged them to donate to our Canadian neighbors. When it was all said and done the guild donated over 15 quilts to them. I was so happy to include the baby sized Fiesta quilt in one of the donation boxes!
As I write this I am at (nearly) the edge of the world… see, I’m from a tiny island in the Shumigan Islands just off the Aleutian peninsula. I am trying to get home to Kodiak before this post goes live (internet is sketchy here)!
I just had my yurt set up and am trying to get power and water/sewer to it.
My yurtWorking on interior.
My unboxing video can be found here (my YouTube channel):
This month Island Batik has challenged the Ambassadors to use their fabrics to make something to celebrate the holidays at the end of the year. This was a seriously fun project for me!
You see last Christmas (or, actually, a couple weeks before) I realized I had promised my great nieces and nephews stockings. I had spent the 2019 Christmas holiday with them and HATED their store bought knitted stockings that I couldn’t get my hand into (and presents out of)! I had promised to make them something better. In November 2020 I put the petal to the metal and came up with 5 quilted stockings. FUN! (See earlier post.)
And addictive! I made the kids theirs and just kept going. First off using scraps then trying to order Christmas fabric online. A nearly impossible trick in December… you have to start in JULY!
I did manage to find some fabric and ordered it. I bought a 5” square pack of Island Batik and made some fun stockings. (I think I was channeling July’s challenge seven months early!)
2020 stockings
When this July’s challenge rolled around I was out of Christmas fabric but had some delicious scraps!
I love some purple and teal!
I spent the afternoon meandering through my scraps and fell in love with my colorway!
I put all my great Island Batik stockings together to compare them.
Well, that just made me think about what else I could make. I ran across a wine tote and decided to try out making a couple. After I tried a scrappy one I got serious and used left over star pattern from a quilt by Cindi McCracken.
I think these totes/caddies could be pretty addictive and a great gift to wrap a gift in.
Both the stockings and wine caddy are fun ways to use scraps (thank you, Island Batik!), scrap batt (Hobbs!) and practice quilting (using Aurifil and Schmetz, of course!).
It’s never too early to think about end of the year festivities… now maybe I need to make a couple totes for the Winter Solstice! I hope everyone is staying cool in these heat waves down south.
This month’s challenge was FUN to do. Any time I get a chance I LOVE to make a quilt for an elder at the Chiniak Bay Elder House.
You see, years ago my mom, who had Alzheimer’s, was a resident of the Elder House at Providence in Kodiak. What I noticed that fellow residents would roll by her room and peek in and they often would slow down and look longingly at her quilts. About a year after her being an individual served by the Elder House they moved into the newly built Chiniak Bay Elder House. I went to the local guild and asked them to make quilts for all the 18 residents moving into the new facility. Of course, the response was overwhelming–yes! A quilt was made for each resident in colors they preferred and in a size (bed or throw) that they would use.
What I notice years later is that most men prefer blue and white quilts. I have made 1-2 quilt tops a year for any new residents and usually, in anticipation, in blue and white. The local guild, Kodiak bear Paw Quilter’s Guild, continues to support the effort to give each resident a quilt by paying for backing, batt and quilting for each top donated.
When Accuquilt threw down the Love and Joy Challenge I knew that I would use the blue and white Island Batik fabric I had to make a quilt to donate. I was given a Maple Leaf die in my January ambassador box and was asked to use an additional 8″ GO block to round out a quilt.
I had never used the GO! fabric cutter before but was all game to learn a new skill. The GO! Qube Mix & Match 8″ Block system is very clever. You pick the block you want to make, find the corresponding dyes, and make! I chose the Dutchman’s Puzzle block and began building a quilt top using Schmetz Needles in my Bernina and Aurifil thread:
I ended up with a VERY busy small quilt…
YIKES! That was too much and not enough! So, in order to expand the size and break up the pattern I added some “blanks”. Visually I also wanted to go from light to dark as well. I ended up putting it all together and immediately started sewing (forgetting to take a picture of the layout).
After a few borders and a quick picture session at the Chiniak Bay Elder House I felt like it was ready to hand over to a guild quilter to finish.
I have all the confidence in the world it will be well loved and used.